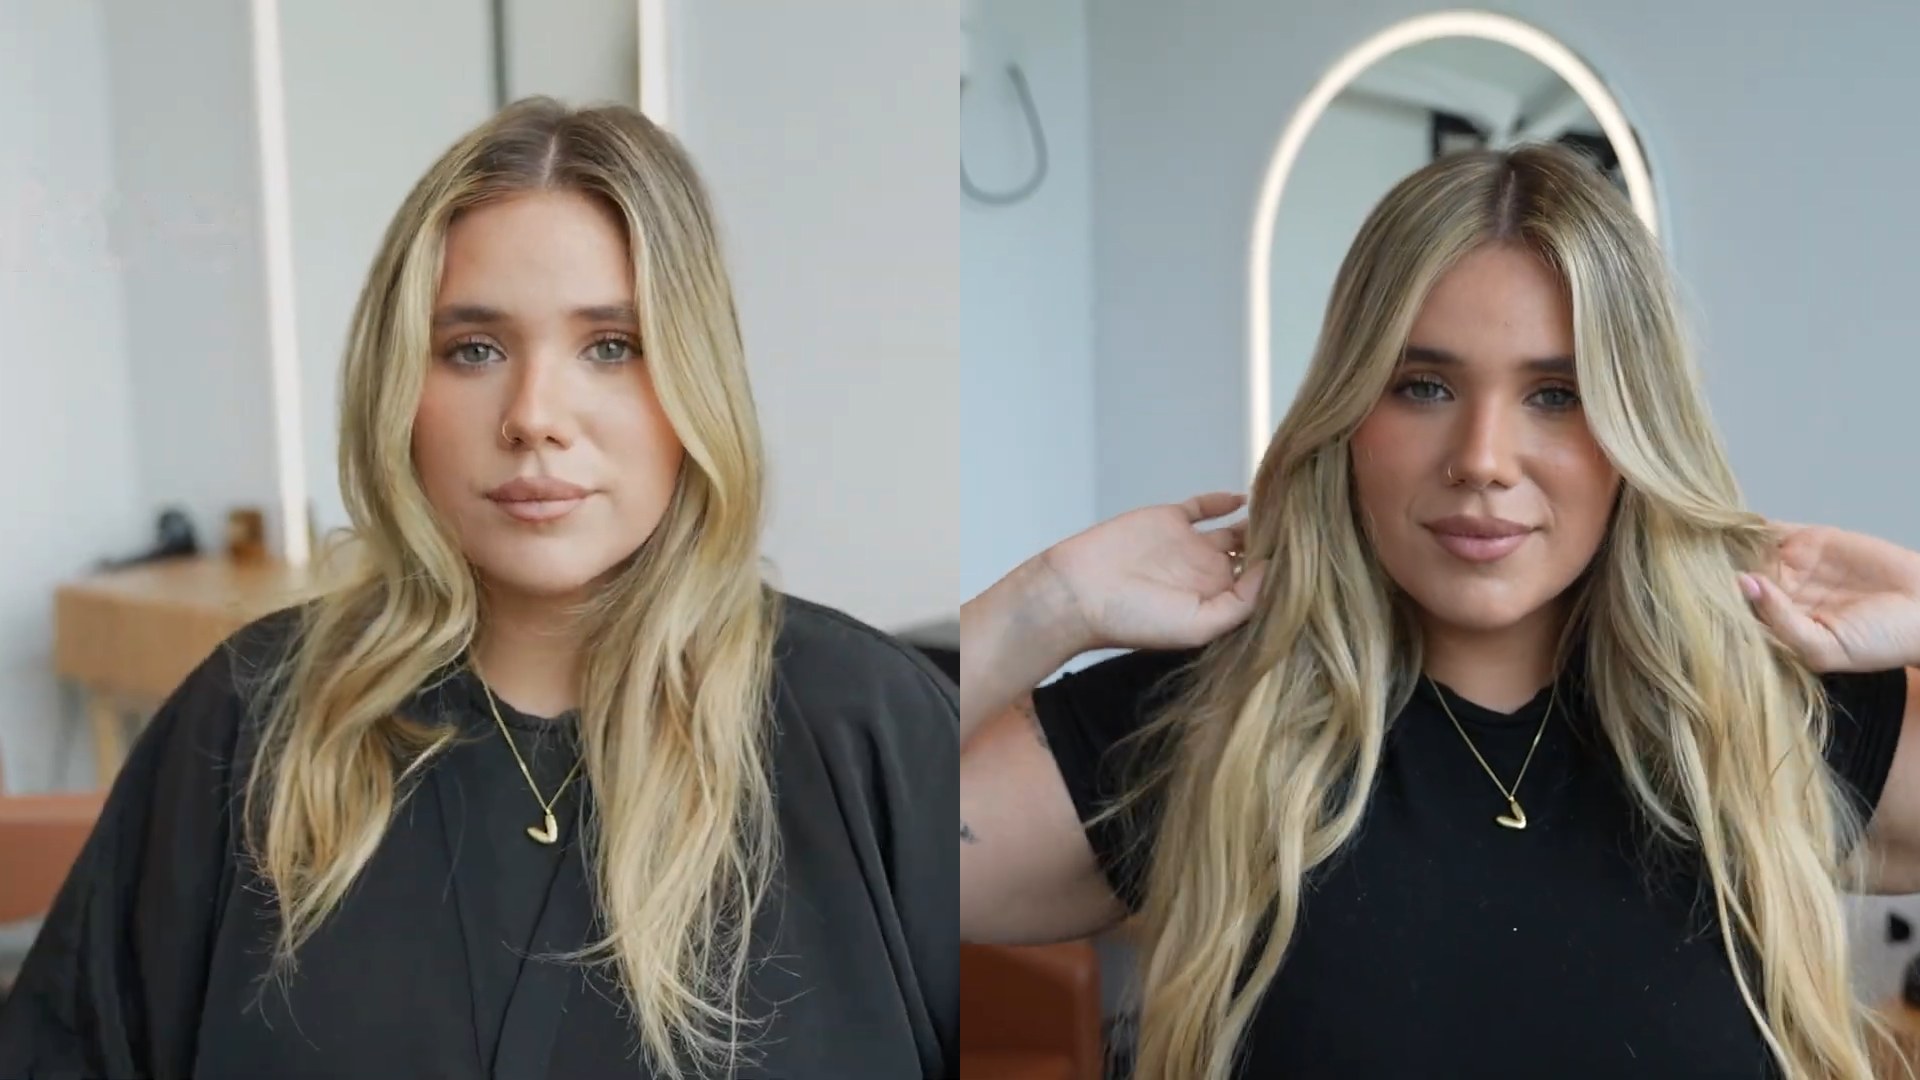
Step One: Rebuilding Brightness with Strategic Foilwork
Since Valentina's last appointment was a couple of months prior, Anthony started by placing foils at the nape to create brightness low in the head, then pulled a "drop out" through the mids and did a tip-out on the ends. This combination does two things at once: it brightens the ends and connects that brightness back up toward the face for a cohesive, all-over glow.
Through the top sections, Anthony angled his foils diagonally toward the face frame. This diagonal placement is a deliberate choice — it keeps concentrated brightness around the face while allowing the back sections to hold onto more natural depth, avoiding the flat, overly-blonde look that can happen when foils are placed too uniformly. The result is a dimensional base that feels "lived-in" rather than freshly bleached.
Step Two: A Root Shadow for Seamless Grow-Out
To keep the color looking natural rather than "high-maintenance blonde," Anthony followed the foils with a root shadow, dragged down roughly an inch and a half and left to process for about 10 minutes — combing through halfway to soften the line of demarcation.
Around the face, he shifted technique slightly, painting the root shadow using diagonal sections and pulling it a bit further down. This face-framing placement accentuates brightness exactly where it has the most visual impact, while the comb-through (both mid-process and as a final step) blends everything into a soft gradient instead of a hard line.
Why this matters for regrowth: A well-placed root shadow doesn't just soften today's color — it extends the life of the highlight service by giving new growth somewhere to blend into, which is especially valuable for clients on a 2-3 month cadence like Valentina.
Step Three: Installing the Extensions — Placement Is Everything
With the base color set, Anthony moved into the K-Tip install using two Bellami shades chosen specifically to mirror the dimension he'd just created with foils:
- Desert Blonde, placed toward the back and lower sections of the head to build gentle depth and dimension underneath.
- Golden Blonde, concentrated around the face and anywhere Anthony wanted to echo the brighter pops already present in Valentina's natural color.
Sections were taken horizontally, working up the head, which is standard practice for even weight distribution — but the shade placement is what elevated this install from a simple length-and-volume add to a true color-matching service.
One detail worth stealing for your own face-framing installs: around the hairline, Anthony trimmed the corners off the keratin bonds. This makes the K-Tips smaller and less noticeable exactly where the hair is finest and most exposed — a small step that has an outsized impact on how "invisible" an install feels near the face.
The Result
The payoff of this two-shade approach was immediate. Valentina described the extensions as weightless, saying she genuinely couldn't feel them in her hair — a testament to both the placement strategy and the K-Tip method itself. The finished look delivered natural-growing dimension through the base, with bright, face-framing pops exactly where Valentina wanted them — proof that a thoughtful blend of two adjacent blonde shades can look more custom than a single-tone install ever could.
Product Callout: The Shades Behind the Blend
This transformation relied on the tonal relationship between two neighboring Bellami blondes — close enough to blend seamlessly, distinct enough to create real dimension.
🔸 Bellami Keratin-Tip Desert Blonde Extensions Placed through the back and lower sections to build foundational depth without competing with the client's natural base. A workhorse shade for stylists building dimensional, multi-tonal blonde installs. View Desert Blonde K-Tips →
🔸 Bellami Keratin-Tip Golden Blonde Extensions Concentrated around the face and anywhere brightness needed to pop, Golden Blonde delivered the warm, sunlit tone that ties the whole install back to Valentina's root shadow and face-framing foils. View Golden Blonde K-Tips →
Pro tip: Pairing two adjacent shades — rather than relying on a single tone throughout — is one of the fastest ways to make an install look custom-colored instead of "off the shelf." Use your foil map as your guide for where each shade should live.
Want to Master This Technique Yourself?
Multi-shade K-Tip placement, seamless root shadowing, and face-framing bond customization are exactly the kind of hands-on skills that are hard to learn from a video alone. Bellami's Single Method in-person education courses put stylists in the chair with expert educators, working through real K-Tip applications from sectioning through final blend.
There are multiple K-Tip-focused sessions on the calendar — a great next step if you're ready to bring this level of dimensional extension work into your own studio.
Browse upcoming Bellami Single Method courses →
Transformation by Anthony Kasus, Madre Hair, West Hollywood. Extensions and shades courtesy of Bellami.


